Friday, August 21, 2009

Souffle Milanaise (Cold Lemon Souffle) with Raspberry-Rum Sauce


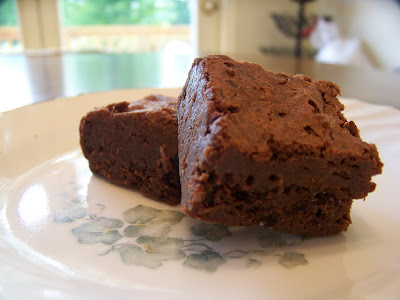
If you have made souffles before, you know how they are hardly not difficult. Basically a whipped cream mixture and meringue mixture folded together. Bake it or refrigerate it, depending on what type.
Souffle Milanaise is a beautiful way to end any meal. Perfect for summer, using fresh lemon, spooning through the lighter-than-mousse souffle is such a lovely experience. Have an almond brittle spotted through the souffle for texture, a little of the crimson sauce and good conversation, and you'll wonder why you didn't have dessert first.


I have made this recipe four times to date, and what I love about it the most (no, not the rum in the sauce for all the smart ones out there) is the concept of folding in the almond brittle.

Just after you have folded together the souffle, before you put it in the fridge to set, you make up a simple almond brittle (sugar, water, almonds) and cool it, smash it, and fold the little pieces into the souffle. Let it set, and when you eat it, instead of simply spooning through the souffle pudding (which is undoubtedly great) you have the little bits of almond which not only add a little sweetener, but they bring a texture to the dessert so it is more of a deliciously filling experience, as many people don't like the souffle slipping down their throats. If you are used to thick desserts (cake, pie, trifle), and haven't quite caught on with the extreme lightness of the Souffle, this idea is simply smashing.


****************************************************

SOUFFLE MILANAISE

Ingredients:

5 Eggs separated
1 1/4 cup Sugar
2 cups Whipping cream
3 large Lemons
2 Envelopes unflavored gelatin
1/8 teaspoon Cream of tartar
Fresh raspberries (optional)


Directions:
Beat together egg yolks and sugar. Grate rinds of lemons (this is optional, but preferable) and squeeze out juice, measuring out 2/3 cups lemon juice. Add rind to the egg yolks, then gradually add the 2/3 cups lemon juice, beating all the while. (This "cooks" the egg yolk.)
Soften the gelatin in 1/2 cup of hot water and beat until it is dissolved. Allow to cool slightly. Whip the cream lightly and stir into lemon mixture; then stir in gelatin and continue stirring until mixture begins to thicken. Beat egg whites with cream of tartar until stiff but not dry; fold into lemon mixture.

Make Almond Brittle* (recipe below) and fold into souffle.
Spoon souffle into dish and chill in refrigerator until completely set (about two hours, can do overnight).

Before serving, garnish souffle with raspberries if desired.

Make Raspberry Rum Sauce* (recipe below) and place 1-2 tablespoons over each serving.


* Both Almond Brittle and Raspberry RUm Sauce may be prepared long before hand and stored in the fridge or larder. Ensure to rewarm the raspberry sauce because it sets gently when left alone.

ALMOND BRITTLE
This recipe is simple, but it is easy to burn. Vigilance is key.

2 cups blanched almonds (or pecans)
1 cup sugar
1/4 cup butter
1 tsp vanilla

Combine almonds, sugar and butter in skillet.
Cook over medium heat, stirring until almonds and sugar are golden brown.
Stir in vanilla.
Spread almonds onto foil.
Cool.
Break into chunks, enclose in ziploc bag and with rolling pin, smash until reasonably fine.*

*Do not break them too much, otherwise the resulting powder has no texture or place in the souffle. Do not leave pieces too large as to be an issue when eating the souffle. It should be easy to discern.


RASPBERRY RUM SAUCE

Seedless Raspberry Preserves *
Rum **

Heat the desired amount of preserves in a bowl in the microwave for 3 minutes, or until almost runny. Stir.
Pour desired amount of rum into preserves, stirring and sampling until flavoured to personal taste.

* You can use regular raspberry preserves and strain out the seeds with a metal strainer when it is warmed and runny. Try to strain as completely as possible.
** Brandy or whisky may be substituted if suffering from a deficit of rum.


Make sure you consume this on the day, or the day after. Store in the refrigerator of course, but it doesn't keep well for long.

Thursday, August 20, 2009

Stained Glass Cake


I honestly do not think I will ever come across a more colourful dessert.


Upon seeing this bizarrely colourful cake, I really wanted to make it for the next family event.
Other than being softly sweet and brightly colourful, its gentle texture and lightness made it perfect for the finale of a large summer meal.
I paired it with a Souffle Milanaise (cold lemon souffle) for supper when we had our dear friends the Shanahans come over, and then when the McWhirters came over, and it was then paired with a large English Trifle. On both occasions we had a real blast; and not just because we had the Stained Glass Cake for dessert.


This Stained Glass Cake could almost be counted as one of my Redwall recipes, because not only do I not know where quite to categorise it, but because of the stained-glass idea, it is like a monastery window, which is Redwall.
This is a huge crowd pleaser, because it makes the adults feel refreshed by the lightness, and the little ones become eager due to the colours. Blue jello for me it what really makes this recipe. You can make it for Christmas, using only red and green jello, who knows?
In one sentence, this neat recipe is gelatin mixed into whipped cream, with 3 different choices of jello cubes folded into it, on a graham cracker crust. Tada.


**************************************

Stained Glass Cake
From Cook's Country, June/July 2009

12 graham crackers, crushed to fine crumbs (about 1 ½ cups)
¾ cup sugar, divided
5 tablespoons butter, melted and cooled
3 (3 ounce) boxes Jell-O
4 ½ cups boiling water
¾ cup pineapple juice
1 envelope unflavored gelatin
2 cups heavy cream
1 teaspoon vanilla extract
1/8 teaspoon salt

For the crust: Adjust oven rack to middle position and heat oven to 325 degrees. Stir cracker crumbs, ¼ sugar, and butter in bowl until crumbs resemble wet sand. Press into bottom of 9-inch springform pan and bake until edges are golden brown, 12 to 15 minutes. Cool on wire rack.

For the filling: In 3 separate large bowls, whisk each box Jell-O with 1 ½ cups boiling water until dissolved. Pour into 3 loaf pans or pie plates (I used cake pans) and refrigerate until set, about 4 hours. Once set, cut into ½-inch cubes and keep chilled. Combine ¼ cup pineapple juice and unflavored gelatin in bowl. Microwave, stirring occasionally, until dissolved, 1 to 3 minutes.
Slowly whisk in remaining pineapple juice. With electric stand mixer set on medium-high, whip cream, vanilla, salt, and remaining sugar until stiff peaks form, about 3 minutes. Reduce speed to low and slowly add juice mixture until combined.
Gently fold Jell-O cubes into cream mixture. Scrape into prepared pan and refrigerate until set, at least 4 hours or up to 2 days.

This cake should be eaten the day of or after. Though stored in the refrigerator, it doesn't keep well after 2 days of sitting.

Wednesday, August 19, 2009

Supreme Chocolate Brownies

I seriously had to put this one up as soon as I could.
Because I want it to get out there and have everyone making it!

I was searching for the best chocolate brownie recipe, when I happened upon this one and its description alone won me over. I paired this recipe with a Pumpkin Mousse Pie after tea for my friends one Sunday; and I dare anyone to show me a better recipe.
This is the smoothest, fudgiest, most succulent fudge brownie ever invented, with nothing added but a full-powered chocolate flavour.
You can add nuts if you want, but it would be like adding nuts to a chocolate mousse!


Seriously, one thing which is unbelievable about this recipe is that you can either have it normal, and it will have the soft fudgy cake texture; but heat it up on a saucer in the microwave for less than 10 seconds, and it will instantly become a block of chocolate mousse. Your spoon will glide through it and you would have never thought it was a brownie.

Beat that.

The method is so simple; I suppose the trick would be in not baking the batter completely, and then refrigerating it after cooling a bit.
This would be delicious paired with another dessert, or had on its own with a glass of milk, as the remnant brownies were treated the next day.

Enjoy!


SUPREME CHOCOLATE BROWNIES

1/2 cup plus 2 tablespoons
(1 stick plus 2 tablespoons) unsalted butter
5 oz bittersweet (not unsweetened) or semi-sweet chocolate, broken up or coarsely chopped
2/3 cup all-purpose white flour
1 1/2 tablespoons unsweetened American-style cocoa powder, sifted after measuring
1/4 tsp salt
1 cup sugar
1/3 cup packed light brown sugar
3 large eggs
2 1/2 teaspoons vanilla extract

Preheat oven to 350 degrees F. Lightly grease an 8 inch square baking pan, or coat with nonstick spray. Line the pan with aluminum foil, letting the foil overhang two opposing sides of the pan by about 2 inches. Grease or spray foil with cooking spray.

In a large, microwave-safe bowl, microwave the butter and chocolate on 100-percent power for one minute. Stir well. Continue microwaving on 50-percent power, stirring at 30 second intervals. Stop microwaving before the chocolate completely melts, and let the residual heat finish the job. (Alternatively, in a large, heavy saucepan, melt the chocolate and butter over lowest heat, stirring frequently being very careful not to burn. Immediately remove from heat.) Let cool to warm.
In a small bowl, thoroughly stir together the flour, cocoa powder, and salt and set aside. Stir the sugar and brown sugar into the chocolate-butter mixture until well combined. Add the eggs and vanilla, and stir until sugar dissolves and the mixture is well blended and smooth. Stir in the flour mixture just until evenly incorporated. Turn out the batter into the baking pan, spreading to the edges.

Bake in the middle of the oven for 28-33 minutes, or until the center is almost firm when tapped and a toothpick inserted in the center comes out clean except for the bottom 1/4 inch which should still look moist. Transfer the pan to a wire rack and let stand until brownie is completely cooled. Refrigerate until well chilled.

Using the overhanging foil as handles, transfer the brownie to a cutting board. Carefully peel off and discard foil. If desired, cut away and discard any overbaked edges. Using a large, sharp knife, cut the brownie into 12 bars, wiping knife clean between cuts.


Store in an airtight container for up to a week, or freeze for up to a month. If freezing, leave brownie slab whole and cut into bars when partially thawed.

Tuesday, August 18, 2009

Pumpkin Mousse Pie


We had a some friends, the Pendraks (great name - reminds me of Pendragon, Arthur of Camelot's father), coming around for a visit and I was really into mastering pie-making.
Well, master pie crust-making, that is. It's far from easy.

We had that canned pumpkin ....stuff.... in the cellar and I really didn't want to have to wait till Thanksgiving to make a pumpkin dessert. (if you didn't know, I'm a huge fan of pumpkin pie)

So I decided to make a pumpkin turtle pie, which I had seen repeatedly in food magazines at various appointment offices and market centres. When the day-before-the-big-day came, I looked at the method of the pumpkin turtle pie, and suddenly felt exhausted. It was a good deal of work, having to homemake the caramel ice cream topping and all.
Ugh.
Problem was that I really wanted to do a chocolate cream pie, but I was dying to try this new fudge brownie recipe I had, so I needed to pair it with something non-chocolate.
Pumpkin was good.

I wanted an easy pumpkin dessert, but not as plain as the all-American pumpkin pie.
I looked up pumpkin pie, and then tried 'advanced pumpkin pie' or 'incredible pumpkin pie'. No luck. Recalling making a chocolate hazlenut mousse pie with a dark chocolate glaze for my friends the Reitzigs when we went to their home, I wondered if a pumpkin mousse pie existed.
Well, the result is obvious, otherwise this recipe would be about something else, eh?


The method for the recipe was pretty advanced, but as many of the recipe comments stated, the crust was to die for. Look at it in the photo; cocao powder with cinnamon and nutmeg.

I guess that was the trap, for I only realise now that the pumpking turtle pie would have been way easier! Maybe I'm stupid that way.

Anyway, it definitely worked out, I refrigerated the mousse pie overnight and served it the day after along with the best brownie recipe ever written. (If you disagree, send me your better one, I dare you.)

The flavour was not too sweet, but lovely smooth, and the crust was just so good. I would reuse the crust for other recipes.
Overall, I find that the recipe was too complex and time consuming to pay off, and would definitely go for a much simpler mousse filling. But hey, it was on Martha Stewart's website, and since she's so frank and among my favourite tv chefs, I just went along. Besides, presentation is was such a winner with this one.


***********************************************


PUMPKIN MOUSSE PIE
Serves 8 to 10

Ingredients

9 ounces graham crackers
3/4 cup plus 1/3 cup plus 2 tablespoons granulated sugar
3 tablespoons Dutch-process cocoa powder
3/4 teaspoon ground cinnamon, plus 1 tablespoon for dusting
1/4 teaspoon plus a pinch ground nutmeg
12 tablespoons (1 1/2 sticks) unsalted butter, melted
1/4 cup brandy
2 tablespoons unflavored powdered gelatin
3 large eggs, room temperature
1 1/2 cups homemade Pumpkin Puree, or canned
1/4 teaspoon ground allspice
1/4 teaspoon ground ginger
1/2 teaspoon salt
1/4 cup sour cream
1 1/2 cups heavy cream
2 tablespoons confectioners’ sugar
1/2 teaspoon pure vanilla extract

Directions

Heat oven to 325 degrees. In a food processor, combine graham crackers, 1/3 cup plus 2 tablespoons granulated sugar, cocoa powder, 1/4 teaspoon cinnamon, and pinch nutmeg; process until finely ground. Transfer to a medium bowl; mix in butter with a wooden spoon. Press mixture onto bottom and sides of a 10-inch tart pan. Bake until set, 12 to 15 minutes. Set crust aside to cool.

In a small bowl, place brandy and 2 tablespoons water. Sprinkle gelatin powder over liquid; set aside to soften, 10 minutes. In the bowl of an electric mixer fitted with the whisk attachment, beat eggs on medium-low speed until fluffy. While the mixer is running, combine remaining 3/4 cup sugar and 1/4 cup water in a small saucepan over medium-high heat. Cook, stirring occasionally, until temperature registers 245 degrees (firm-ball stage) on a candy thermometer, about 5 minutes. Immediately turn mixer to high speed. Carefully drizzle sugar mixture into eggs in a thin stream; continue to beat until mixture increases in volume and is pale yellow, about 5 minutes. Meanwhile, place bowl with softened gelatin over a saucepan of simmering water; stir until gelatin has dissolved.
Turn mixer to low; add gelatin mixture to egg mixture. Add pumpkin puree, remaining 1/2 teaspoon cinnamon and 1/4 teaspoon nutmeg, the allspice, ginger, salt, and sour cream; combine. Pour filling into pie crust; refrigerate until set, 4 hours or overnight.

To serve, whisk heavy cream, confectioners' sugar, and vanilla in a medium bowl until stiff.
Using an Ateco #864 star tip, pipe whipped cream in rosettes onto pie (or spread the whipped cream evenly over the top of the pie with a spatula). Sift remaining tablespoon cinnamon on top. Serve chilled.


Monday, August 17, 2009

Moist Honey Cake


Upon revisiting a series of books I have not read since I was much younger, that of brian Jacques' Redwall, I decided to take the book of talking animal adventures to a new level.

One of the most popular aspects of the the colourfully written childrens' books has been the incredible feasts Brian Jacques -- who is actually a cook himself -- creates for different festivities and occasions for his characters. The magnifacent choices of European foods, mainly English and Scottish, could make anyone's stomach grumble.
So when I began looking at the books a second time, I began to enjoy the feasts in a completely different light - wondering what I could cook.
First thing that jumped out at me was the commonly said "honey cakes". I consequently googled honey cakes and saw many recipes available, but decided on a slightly more complex one which would more fit the idea I had in mind.

This is actually a Jewish recipe, and as I have a great attraction to Jewish recipes -- I actually have an old book on them, if that doesn't sound too random -- I decided I definitely wanted to choose this one as my first Redwall endeavour.

What I love about this recipe so much is that it has three additions to its compelx blend which you can barely identify in the flavour of the result. You would never guess.
Brewed coffee. Whisky. Orange juice.
Alright, if you guessed those, I'll just go hide somewhere.

I had read it in the webpage which held this recipe that the cake falls, and even after I saw the picture of them, I thought, "Okay, I can follow."


But when the baking timer went off and I looked at my three honey cakes I was still shocked out of my stockings. My memory short-circuited and thought I had failed the huge batter. It then clicked that it was supposed to do that.

So , just remember that they are meant to fall, and oh, when they are finished...wow.
Delicious, soft slices, each with a lovely thin crispy crust.
Freezes very well.

I served this for my Redwall Breakfast celebrating the 1st of August, but it is also great for morning tea, afternoon tea or dessert. Ensure you serve it with a cup of hot tea or coffee, and with a dollop of Meadow Cream, the famous Redwall cream-honey-and-butter topping that the little characters eat with more than half of their banquet food, Meadow Cream goes with anything!


********************************************
Moist Honey Cake

Adapated from Marcy Goldman’s Treasure of Jewish Holiday Baking
3 1/2 cups all-purpose flour
1 tablespoon baking powder
1 teaspoon baking soda
1/2 teaspoon kosher salt
4 teaspoons ground cinnamon
1/2 teaspoon ground cloves
1/2 teaspoon ground allspice
1 cup vegetable oil
1 cup honey
1 1/2 cups granulated sugar
1/2 cup brown sugar
3 large eggs at room temperature
1 teaspoon vanilla extract
1 cup warm coffee or strong tea
1/2 cup fresh orange juice
1/4 cup rye or whiskey
1/2 cup slivered or sliced almonds (optional)

Fits in three loaf pans, two 9-inch square or round cake pans, one 9 or 10 inch tube or bundt cake pan, or one 9 by 13 inch sheet cake. I made mine in two full-size loaf pans plus two miniature ones.

Preheat oven to 350°F. Generously grease pan(s) with non-stick cooking spray. For tube or angel food pans, line the bottom with lightly greased parchment paper, cut to fit.
In a large bowl, whisk together the flour, baking powder, baking soda, salt, cinnamon, cloves and allspice. Make a well in the center, and add oil, honey, white sugar, brown sugars, eggs, vanilla, coffee or tea, orange juice and rye or whiskey, if using. (If you measure your oil before the honey, it will be easier to get all of the honey out.)
Using a strong wire whisk or in an electric mixer on slow speed, stir together well to make a thick, well-blended batter, making sure that no ingredients are stuck to the bottom.
Spoon batter into prepared pan(s). Sprinkle top of cake(s) evenly with almonds, if using. Place cake pan(s) on two baking sheets, stacked together (this will ensure the cakes bake properly with the bottom baking faster than the cake interior and top).
Bake until cake tests done, that is, it springs back when you gently touch the cake center. For angel and tube cake pans, this will take 60 to 75 minutes, loaf cakes, about 45 to 55 minutes. For sheet style cakes, baking time is 40 to 45 minutes.
Let cake stand fifteen minutes before removing from pan.

Tuesday, July 28, 2009

Tiramisu


Upon seeing the film 'No Reservations', I was fascinated by an Italian dessert the main character brought to a dinner he was catering.


Upon further research, I have found tiramisu to be the most delicious and among the easiest of layered dessert recipes. So heavenly; the pudding is smooth and creamy and the soaked ladyfingers melt in your mouth in a blend of chocolate and coffee and licquor flavours.
And so beautiful!
One of the best parts of it is that you can add as much licquor as you wish, and it can only taste better.

********************************************************

TIRAMISU EXCELLENTE

2 cups prepared vanilla pudding *
3 tbsp amaretto
8 oz. (1 cup) softened cream cheese or marscapone
1 3/4 cup whipping cream
1/2 tsp cinnamon
2 tbsp. sugar
1/4 cup brandy
2 tbsp. Kahlua (or any coffee licquor)
3/4 cup triple-strength coffee (or espresso) **
20-24 ladyfingers ***
1 cup dark chocolate, grated ****

* It is unbelievably better to make the pudding from scratch; please do not use the artificial/canned vanilla pudding; take the little added time and make it for real and its flavour is amazingly better
** You can use savoiardi, the traditional crisp ladyfingers, but I prefer the soft ladyfingers; they soak better
*** Of course, the better the brand of coffee, the better the result; I recommend Mystic Monk's, Peet's, Gevalia or even Starbucks
**** Dark chocolate melts less, allowing for easier grating.

This is one of Italy's favourite desserts, and the name Tiramisu literally means to 'pick me up', perhaps referring to the alcoholic blend.I cannot stress how important it is to remember that this recipe really must be made early inday if not the day before, so to flavours can blend and soften together.Serve this version, which can be completed up to 2 days ahead of time, to surprise your family on a weekend night or for company after an elegant Italian meal.Personally,

I always double the recipe as I make this for big family parties, and make three layers of the ladyfingers and pudding-cream instead of only two.Concerning the liquor, put as much as you want; no holes barred there; the cream can be as spiked as you want, and will only taste better.

Homemake everything, no bought 'whipped topping' nor ladyfingers nor pudding, and it's the best! I hope one day to make my own chocolate for grating; then it'll be totally homemade, haha!

METHOD

1. Prepare the pudding according to package directions using whole mold (makes 2 cups). Cool.
2. In the bowl of your electric mixer, combine the cooled vanilla pudding, 2 table spoons of the Amaretto, the cream cheese and 1/2 cup of cream. Mix thoroughly.
3. Combine sugar, brandy, coffee licquor, remaining Amaretto, and brewed coffee in a bowl. Stir and let cool.
4. While coffee mixture is cooling, in the bowl of our electric mixer, whip the remaining cream and cinnamon until firm. Using a spatula, fold* the pudding mixture into the whipped cream.
5. Dip the ladyfingers in the coffee mixture** and make a layer in a 3-quart trifle-type bowl. Cover with half the pudding-cream, and sprinkle with half the grated chocolate. Repeat. You may decorate the top with chocolate curls.
6. Cover tightly and refrigerate at least 4 hours and up to 2 days before serving.